¶ Kinematics
¶ Overview
CNC GCode programs specify motion in a Cartesian coordinate system, with X, Y, and Z axes at right angles to one another. GCode specifies the X, Y, and Z coordinates of the endpoint of a move. The machine then moves from the current position to that new position, either in a straight line for most moves, or along a circular arc for G2 or G3 moves.
Most CNC machines have motors that directly move in the Cartesian system. There is a motor that moves the machine along the X axis, another for the Y axis, and another for Z. For a motion that is aligned with an axis, only one motor turns, while the others are still. It is also possible to have two motors for one axis, for example on a "gantry" machine where each end of the gantry has its own motor. Those two motors move in lockstep to drive that axis, so this would still be a Cartesian system with the paired motors treated as a single motor for most purposes. (During homing, it is possible to move the paired motors independently for short distances, in order to "square up" a gantry.)
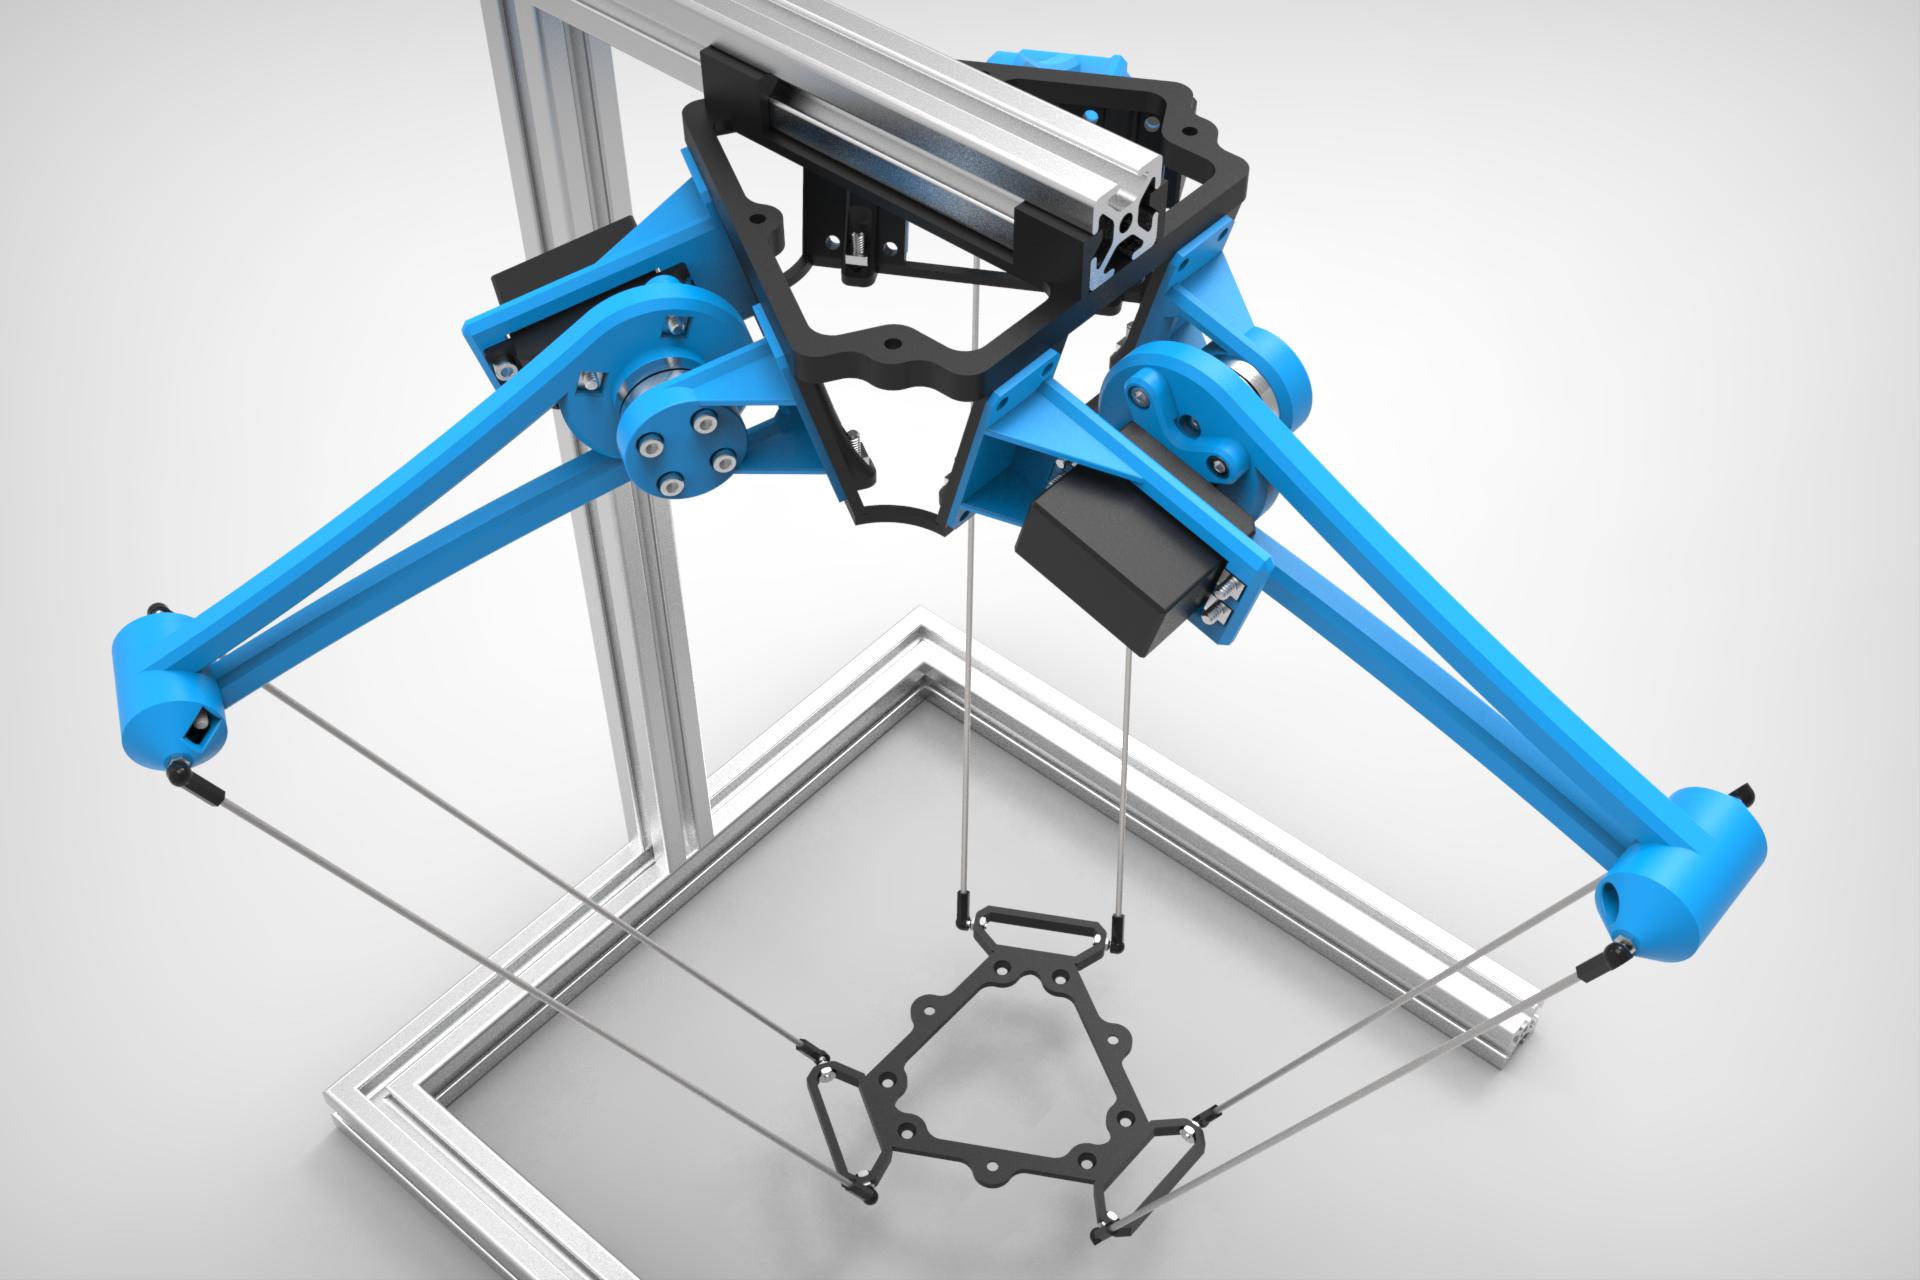
There are other ways to make motors control motion, where complex coordination of multiple motor rotations are necessary for a "simple" motion along a single X, Y, or Z axis. The mathematics for calculating that multi-motor action is called "kinematics". For Cartesian kinematics the math is trivial - just turn the X motor a certain amount to move a proportional distance in X, and similarly for the Y and Z motors. The machine pictured at the top of this page is a "delta" machine in which three motors must turn at once to move the toolhead in a straight line. Delta kinematics math is much more complicated, requiring the solution of a tricky geometry problem in 3 dimensions.
FluidNC supports several kinematic systems as described below.
¶ Setup
The kinematics: section at the top level of your config file specifies the type of kinematics. Some type can have subordinate items. Below are some examples.
¶ Cartesian
Cartesian is the default system. All axes are directly mapped to the motors. If you have 2 motors assigned to an axes, they will move together.
kinematics:
  Cartesian:
x:
  motor0:
    ...
y:
  motor0:
    ...
  motor1:
    ...
¶ CoreXY
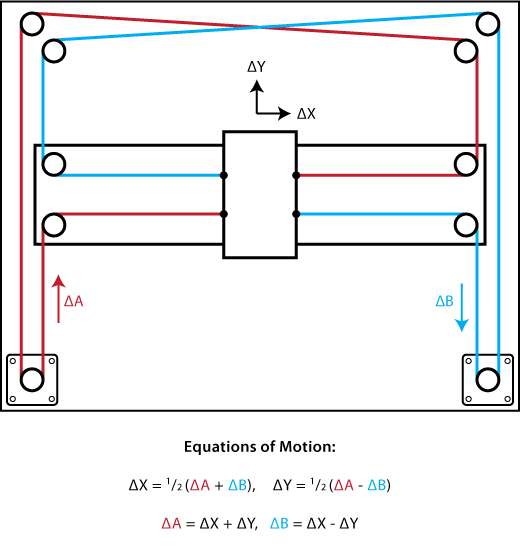
CoreXY is a machine design where two motors work together to move in the XY space, using an arrangement of belts to move the toolhead. To move in the X direction only or the Y direction only, both motors must turn simultaneously. If only one motor turns, the toolhead moves diagonally. The advantage of this non-obvious setup is that both motors can be attached to fixed positions on the frame, so toolhead motion does not require moving the mass of one of the motors as with Cartesian systems. CoreXY systems can thus be quite fast for motion in the XY plane. They are typically used for machines with low-mass toolheads and low-speed or nonexistent motion in the Z direction.
kinematics:
  corexy:
x:
  motor0:
    ...
y:
  motor0:
    ...
In CoreXY systems, the motor listed underneath the x: section is the first one in the pair of cooperating motors, and the motor listed underneath the y: section is the second one. In CoreXY, you cannot have two lockstep motors on one axis, like you can with a Cartesian system. For CoreXY, there are exactly two motors that work together for XY motion.
¶ Getting the directions right.
Getting the directions right can be tricky. If motors are swapped or the motor directions are not right, you will get incorrect motion. This is one method to sort it out.
Manually turn one motor at a time with the other held firmly until the end effector moves in positive X and Y (45 deg). Remember which motor you turned and which direction you turn it.
Now send small jogs like this $J=G91 G21 X5 Y5 F200
You want the motors to do the same thing you did manually.
If the wrong motor moves, swap the motors
If the correct motor moves, but the wrong way then change the direction attribute (:high vs. :low) of that motor.
Restart and test again.
If that jog works, then try jogging in other directions. If that is not right, the only thing that could be wrong is the other motor's direction.
¶ midTbot

MidTbot is a pen plotter that uses a variant of CoreXY kinematics.
kinematics:
  midtbot:
¶ Wallplotter
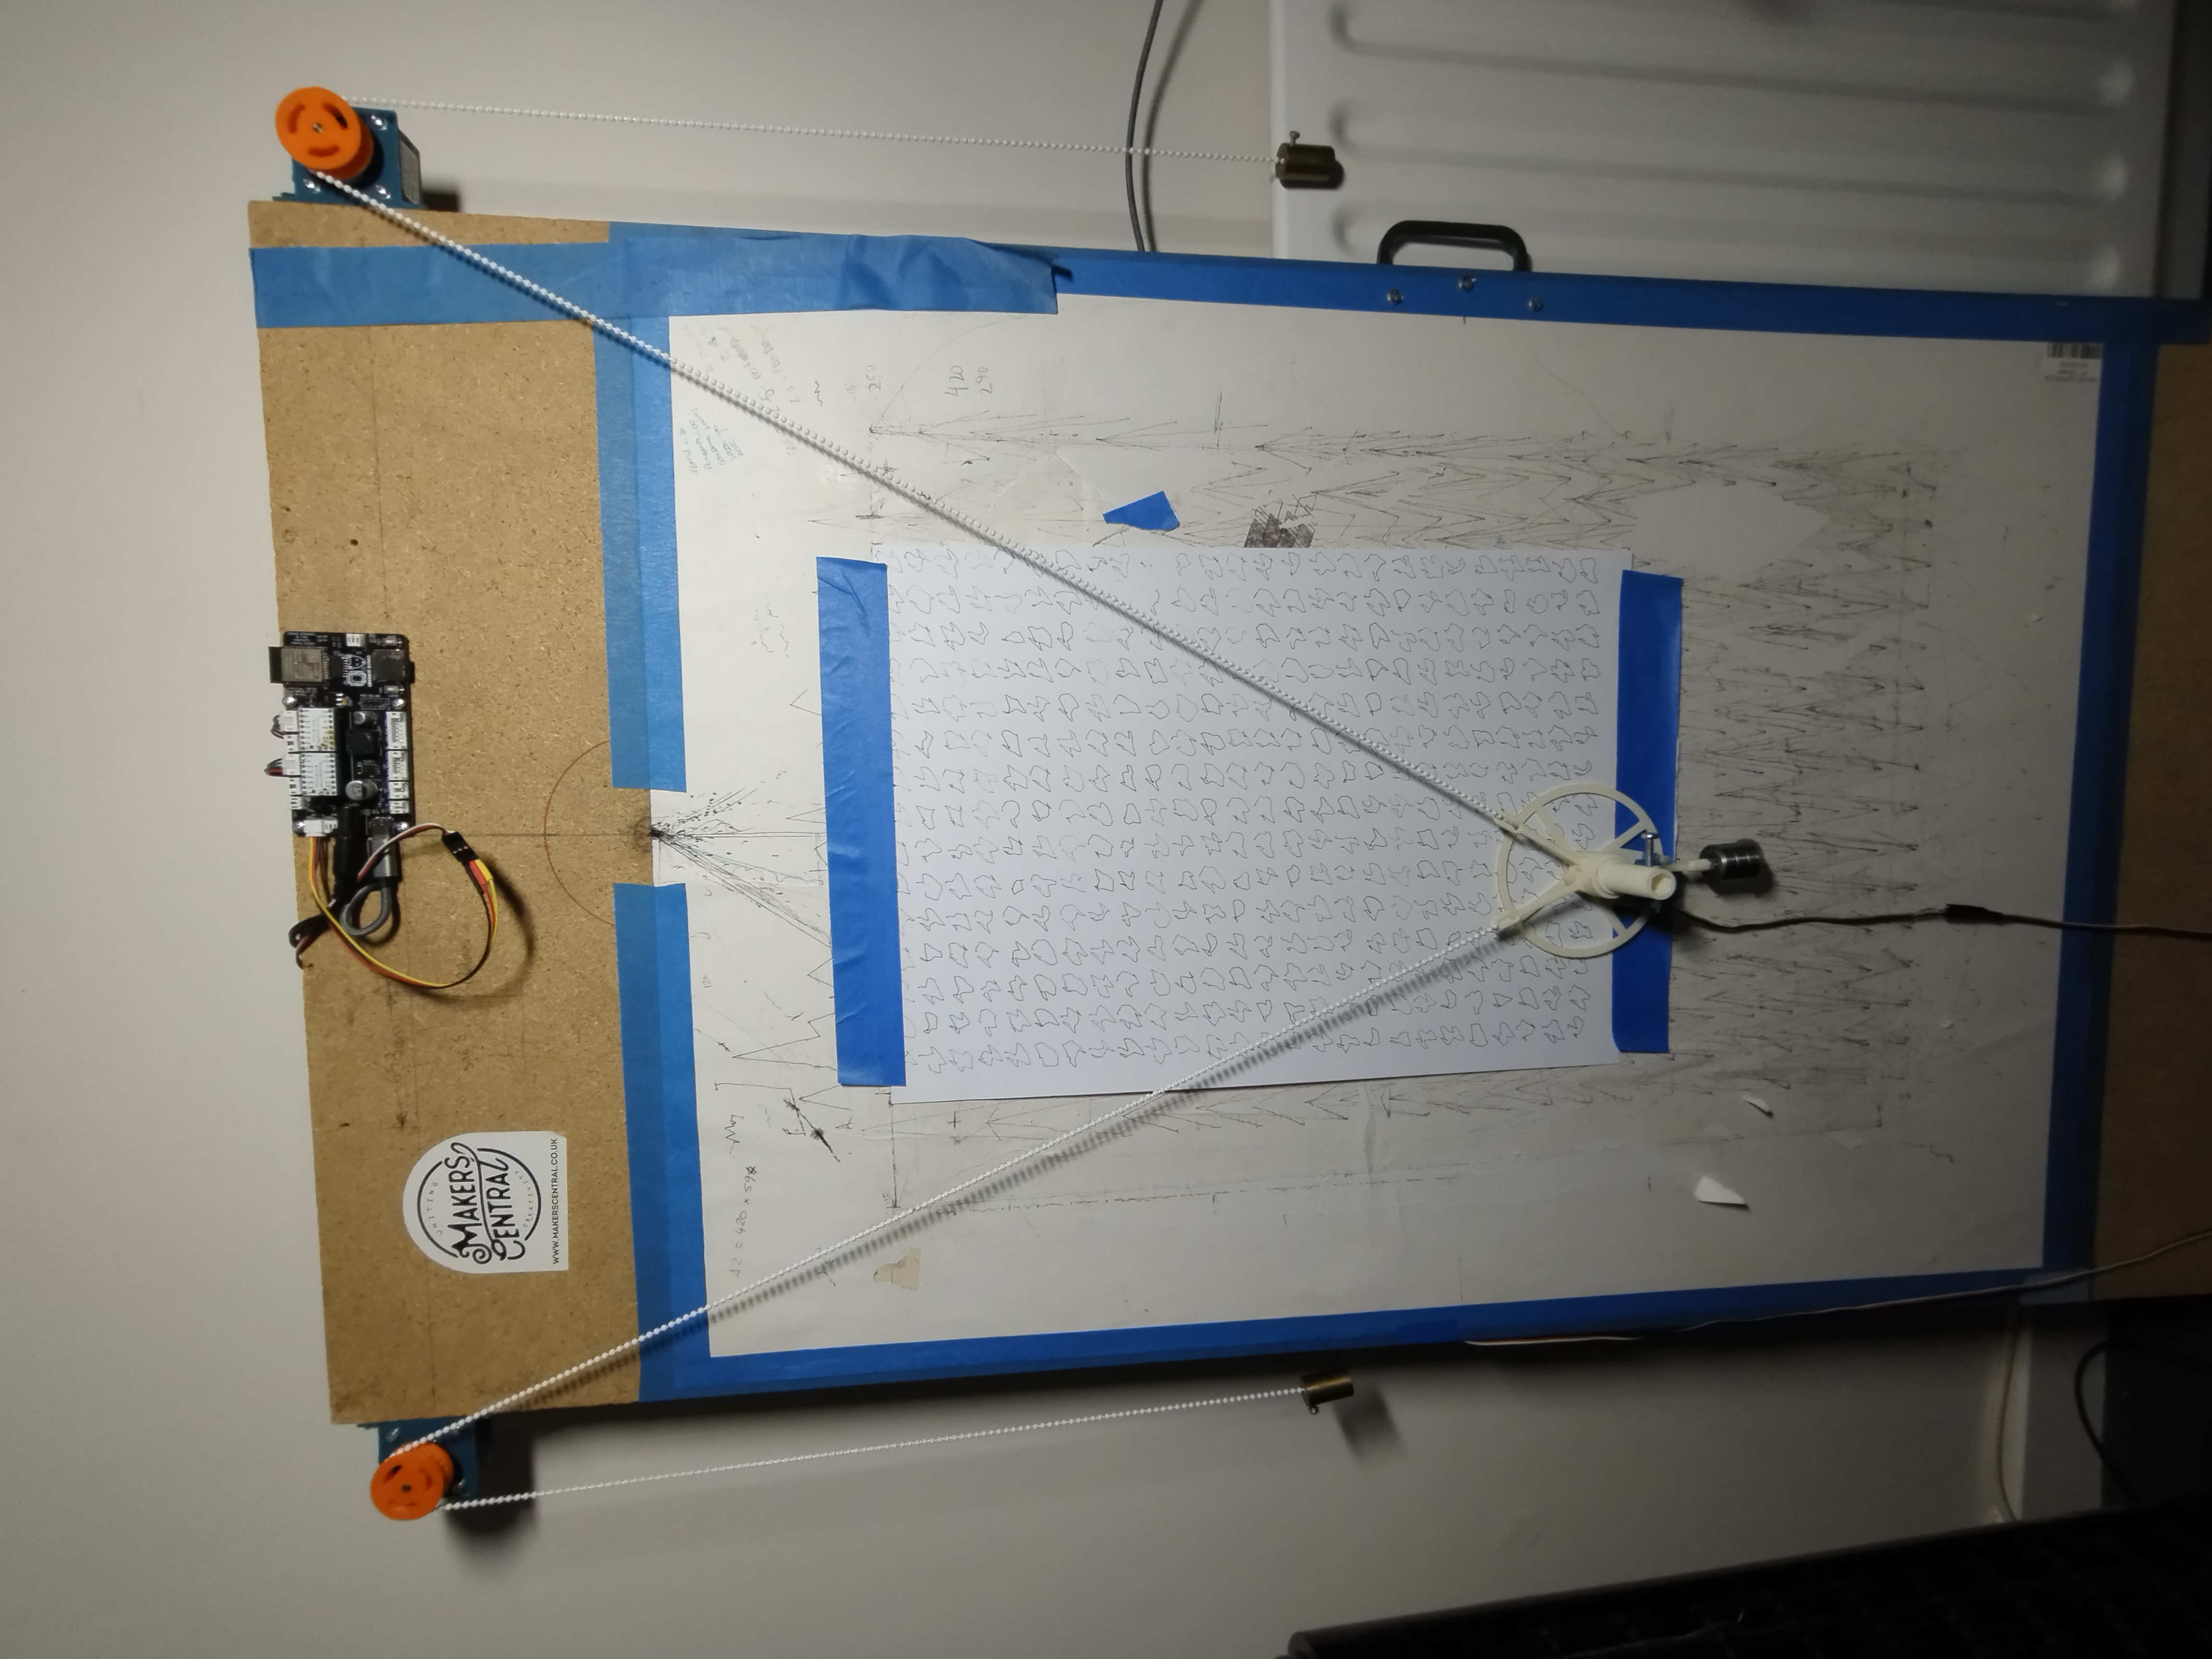
Wallplotter kinematics use a toolhead that is suspended from two cables connected to motors at the upper corners of a nearly-vertical surface. It is similar to the MaslowCNC vertical router.
The wallplotter code was contributed by a user. The primary developers are not actively maintaining the code or providing support. If you have questions, create a post on Github. You should also search for other issues for
Wallplotterand directly ask those users.
This kinematics does not use homing. You must manually move the pen to the 0,0 position as defined by your config settings and then reset the firmware. In the example below, you would move the pen to the center on X and 100mm below the anchors.
It is probably easiest to make sure your motors are correctly defined by doing the initial testing with Cartesian kinematics. This will allow you to move each motor by itself to make sure it works properly. Make sure an X move moves the left motor and a Y move moves the right motor. Make sure both motors move in the proper directions. A move in the positive direction feeds out more cord.
kinematics:
  WallPlotter:
    left_axis: 0
    left_anchor_x: -100.000
    left_anchor_y: 100.000
    right_axis: 1
    right_anchor_x: 100.000
    right_anchor_y: 100.000
    segment_length: 5.000
¶ Tangential Knife
This is an experimental feature, currently only available on a branch.
This kinematics is used to control a tangential knife or oscillating knife. The knife is tangent to the direction of the cut, knife orientation is motorized on C axis. C axis motor position is computed for each XY move to be tangent to path. It means you can use standard XY or XYZ G-CODE.
Many die-cutters do not have a motorized Z axis but use a pneumatic stage to move the cutting head up/down. Electrovanne of the pneumatic stage can be controlled using a solenoid motor. In the case of the pneumatic Z axis, your G-CODE only needs XY information. For the motorized Z axis, G-CODE should provide XYZ data.
This kinematics is not compatible with drag knives. Drag knife orientation is not motorized but free to rotate along the Z axis, the offset between knife tip and axis creates a moment so the knife is following the cutting.
Drag knife path should be generated by the g-code generator.
A tangential knife is always tangent to the direction of motion. When orientation change, the knife is rotated outside the material (lift) or inside the material before or during the move, depending on the following parameters :
- tan_knife_safe_angle_deg : The angle between two movements that will trigger a Z-axis lift when exceeded, in order to rotate the knife safely.
- tan_knife_lift_distance_mm : The distance the knife is lifted when the angle between two movements exceeds the tangential knife safe angle threshold.
- tan_knife_blend_angle_deg : When the angle between subsequent motion segments is less than this value, the knife is not rotated before the angle but during motion. The motion segments also have to be shorter than the tangential knife blend distance.
- tan_knife_blend_distance_mm : When the angle between subsequent motion segments is less than the tangential knife blend angle and the motion segments are shorter than this value, the knife is not rotated before the angle but during motion.
- tan_knife_z_axis_is_pneumatic : True if Z axis is pneumatic. Z axis height will be set to tangential knife cutting height during G1 G2 and G3 move and to tan_knife_lift_up_distance_mm
- tan_knife_cutting_height_mm : The height of the tangential knife when cutting if the Z axis is pneumatic. The value doesn't matter as long as it is negative to trigger a solenoid motor to activate output.
These are default values that I recommend as initial settings.
kinematics:
  TangentialKnife:
    tan_knife_safe_angle_deg: 3
    tan_knife_blend_angle_deg: 1
    tan_knife_blend_distance_mm: 50
    tan_knife_lift_distance_mm : 5
    tan_knife_z_axis_is_pneumatic: true
    tan_knife_cutting_height_mm: -1
¶ Special Kinematics
The types listed above are compiled by default and you can simply add them to your config file. In the future some less popular types may be added and will not be compiled by default. Those will require a #define added to the kinematics.h file.
¶ Using a Gcode Preprocessor
An alternative to putting kinematics in FluidNC is to use a pre-processor. This is a simple program that converts cartesian gcode to the gcode needed for your system before you send it to FluidNC. You could do it in Python or probably even a spreadsheet. For example: A straight move in X on the wall plotter would be converted to the 2 motor move needed for the wall plotter.
G0 X20 converts to G0 X25 Y10
This is an easy way to test the kinematic equations and the performance of your machine.
¶ Create your own type
You can create a new type by adding a new class that is derived from the KinematicSystem class. If your machine is still based on the Cartesian system, like CoreXY, you can derive from Cartesian.
Look at all the virtual functions in Kinematic.h. You will probably want to override most of them in your class. You can search the main code to see how these are called. You can also look at other examples like CoreXY to see what is done.
There is a functional parallel delta kinematics on Grbl_ESP32, that might give you a head start if you want that type of kinematics.
¶ Will we make a custom one for you?
The answer is probably not. It is a lot of work and requires a machine to test on. We are happy to include your code if you write a new one.